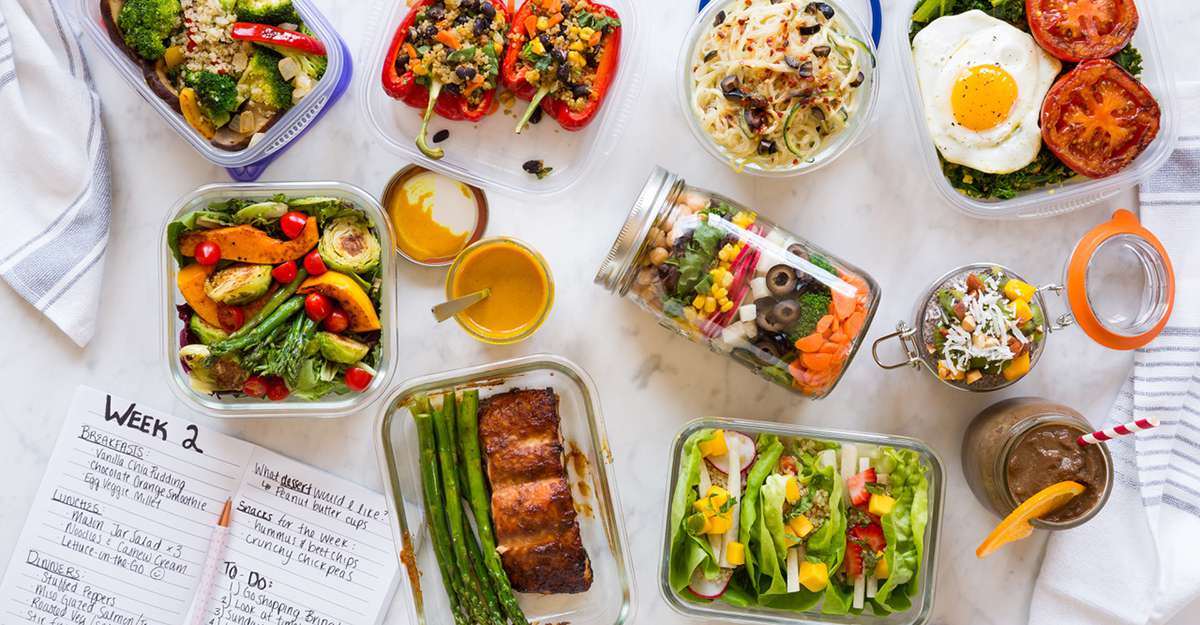
I absolutely love food. Coupled with my complete writer’s block, I’m reverting to this tried and true topic once again (recall my post about Hot Cheetos and pretzels). Maybe today we’ll tackle something a little healthier — or at least, what my Instagram explore feed claims to be healthier: meal prep.

Starting about a month ago, I started making my lunches for the entire school week on Sunday nights. My past school lunches have always bored me, and my mom constantly complained that my food was just comprised of snacks and “wasn’t real food” (for example: my favorite plain spinach, pretzels, and a cutie). If I’m being honest, I don’t even remember what I had been eating for lunch before I started meal prepping. And now, instead of scrambling in the morning right before I leave for school to grab random fruit and granola bars, I kind of feel like I’m adulting.
Plus, ever since track started and my coach’s motivational nutrition talks, meal prepping is my way of attempting to fuel myself properly. I love eating, but Hot Cheetos really aren’t going to cut it 2 hours before running critical velocity 400s.
So get ready to break out your favorite Tupperware as I *whisk* you away on my journey (haha get it) of my average Sunday night. Throughout this extended story time for 25 points, I’m going to debunk one myth I subconsciously conceived from meal prep presented by fitness social media influencers: it is not easy. It takes discipline to do it every week, but I’ve repurposed it as a way to either 1.) make me finish my homework earlier or 2.) procrastinate the assignments I have yet to do. Meal prep takes a hella long time.
This probably is just me and my tendency to be a perfectionist about everything, but I have to set aside at least 3 hours to do my complete meal prep.
Alright so just to give you an overview of my meal structure, I try to fill half my plate with vegetables, then a quarter protein and the last quarter for grains. Currently, I make broccoli and green beans, then chicken and quinoa. Because I literally eat the same thing Monday through Friday, the recipe gets a spicy update every week: at least one food will be exchanged for something else. Example: I swapped potatoes for green beans a couple weeks ago, then rice for quinoa, etc.

Ingredients for this week:
- Quinoa
- Lime
- Jalapeno peppers
- Poblano peppers
- Chicken breasts
- Green Beans
- Broccoli
- Salt
- Black pepper
- Paprika
- Tajin Clasico seasoning
- Cayenne Pepper
- Olive oil
In my attempt to be a health blogger, I’ll even entice you with my own recipes. I bake everything or use the rice cooker because they’re much more passive cooking methods than say, frying or boiling. I’m a second semester senior. I’m lazy. Yet somehow I’ve been making legitimate lunches and I’m not sure how long it’s going to last. While we’re here though, let’s go through it, shall we?
Step 1 (that I always frickin’ forget and it sets back my schedule significantly): Thaw the damn chicken. At my house, we buy those mass packages of chicken breasts from Costco and stick them in the freezer. I have never remembered to move them to the fridge the night before I plan to cook them.
Step 2: Get Netflix set up. Now let’s assume it’s 4 PM (about average for me to start meal prepping). At the moment, I have NCIS playing in the background.
Step 3: Brine the chicken & prepare veggies and grains. In order to bake chicken and keep it juicy, apparently you have to brine it. The internet told me so, and so far it works so I do it.
In a large bowl, the chicken breasts will rest in salted water for 30 minutes. While they’re brining, I prepare the quinoa. I have Costco’s Kirkland Signature Quinoa, which I cook 1 cup raw with 2 cups of water in the rice cooker on the white rice setting. You most definitely can boil it on the stovetop, but that’s a little too much work for me.
I also wash the green beans and broccoli and prepare them to be cooked. The green beans get the ends trimmed off and sliced in half, the broccoli into small florets. They each get their own baking sheet.
Step 4: Seasoning. It’s about 4:30 PM. Once the chicken’s done brining, I pat them dry, transfer to their baking sheet and coat them in olive oil. They get generously seasoned with salt and pepper, then Tajin, paprika and cayenne. I like my spice. The veggies also get olive oil, salt, pepper and paprika. *Special note* that I’ve learned: vegetables need more salt than you think they do.
Step 5: Baking. It’s about 5 PM. Disclaimer, I use both the big oven and a toaster oven so I can cook simultaneously.
The chicken, which is on a smaller tray, fits perfectly in my toaster oven and bakes for 20 minutes at 400 degrees. After that, broil for another 5 minutes at 450 degrees. Then let the chicken rest for 10-15 minutes.
As soon as the chicken’s in, I put in the broccoli and green beans in their own oven. It’s set at 400 degrees also. Typically, the broccoli stays in for 18 minutes and green beans for 40 (I cook a lot of them which means they’re never in one layer, so they take longer.)
Step 6: Pack what’s cooked so far.
The chicken breast is sliced (along the grain) and portioned out into 5 servings into Snapware (shoutout Costco again). The same goes for the veggies. Airtight containers are key here. I cover them as soon as they’re in the boxes, otherwise they dry out quicker throughout the week. Condensation is not actually a problem, I realized, it just looks bad.
Soon after, the quinoa will be ready. Factoring in for time fluctuations and human error, it’s now about 6 PM.
Step 7: Roast peppers.
Plain quinoa tastes disgusting to me, since I was raised on the starchy goodness of glutinous white rice. I flavor my quinoa with roasted poblano and jalapeno peppers for a kick and Vitamin C, which I broil in the toaster oven (again, this is the most passive cooking method I could find on the internet). Broil at 450 degrees for 6-8 minutes at a time, then turn the peppers as they blister and char.
While they’re broiling/roasting, I scoop the quinoa out of the rice cooker and mix with fresh-squeezed lime juice (from one lime) and salt to taste.
Step 8: Finishing touches.
It’s now about 6:30 PM.
Once the peppers are blistered, put them in a covered bowl for 15 minutes to let them “sweat.” This supposedly makes it easier to peel the skin. Then, take off the skin and dice the roasted peppers, then mix into the quinoa.
Taste test everything to make adjustments, usually I have to salt the quinoa and green beans just a tad more. Portion out the quinoa into your Tupperware and you’re all set. It’s now 7 PM and you’ve sucked up 3 hours of your precious time! But you’ve just made your lunch for a whole 5 days so I’m proud of you.
Thanks for reading! I know this was longer than a usual blog post but hopefully it was enlightening in some capacity.
June, this post was super interesting!
I’ve been thinking about meal prepping for quite some time, but I have never found the motivation to create a schedule and find good recipes. I love how you walked us through one of your weeks because it enhanced my appreciation for taking change of your own nutrition and finding a diet that is beneficial for your body.
I know college will make it difficult for you to keep up your cooking regimen, but I hope you can find a way because it seems like you’ve gotten a lot of joy in creating a healthier lifestyle!